Gourmia GTF7600 16-in-1 digital air fryer oven review
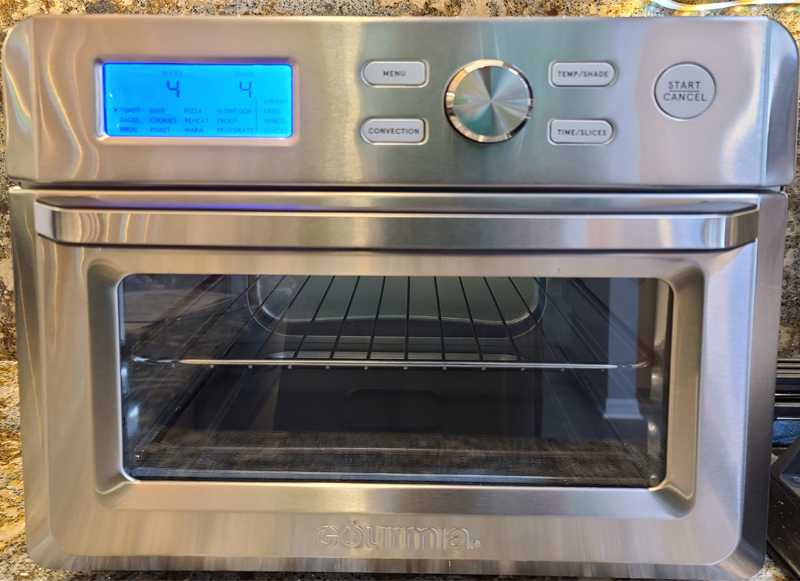
REVIEW – We are retired. That means that nearly all the meals we cook are just for my lovely wife and me. We live in central Florida, where anything that adds excessive heat in the house is a bad thing. That includes stoves. What if there was a small oven that was sized perfectly to cook for two? What if that oven could also double as a toaster? Sounds like a toaster-oven, you say? Well, what if it could also bake, broil and reheat? OK, you say, sounds like a fancy toaster-oven, right? What if it could also proof dough with digital temperature accuracy and dehydrate food? Getting interested? Now, the clincher – what if it could also air fry at temps up to 400F with full surround 360-degree convection air circulation and do all that right on your countertop in a 1.65 sq ft footprint? The Gourmia GTF7600 is just that solution and just became available. Let’s see if this be-all, do-all digital oven lives up to the claims.
What is it?
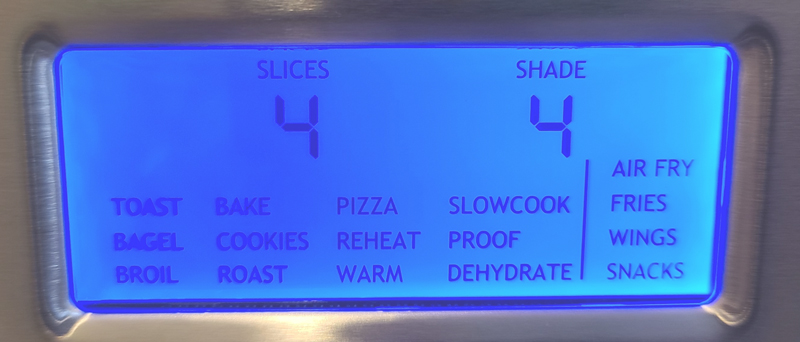
The Gourmia GTF7600 is a multi-function digital oven with preset modes for air fry, toast, bagel, broil, bake, cookies, roast, pizza, reheat, warm, slow cook, proof, dehydrate, fries, wings, and snacks.
What’s in the box?
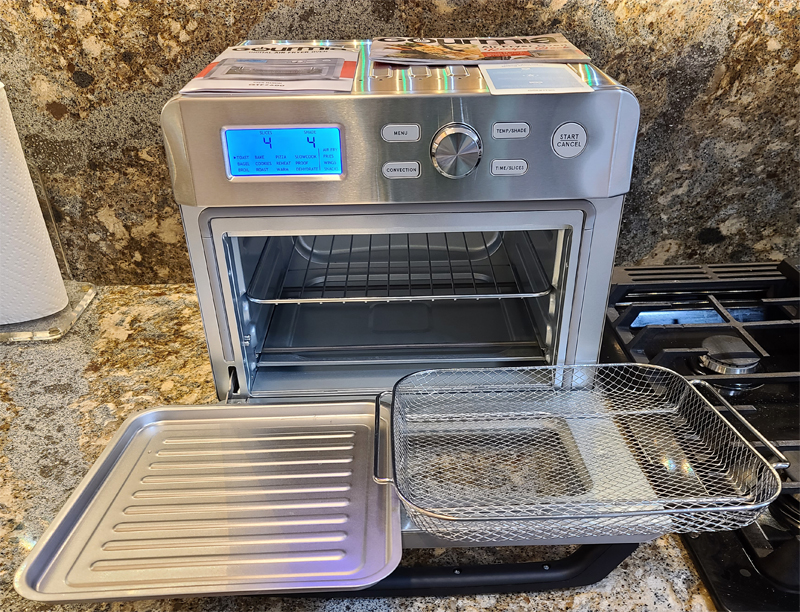
- Gourmia GTF7600 oven
- Oven rack (in the middle of the oven)
- Crumb/drip tray (in the bottom of the oven)
- Baking tray (left)
- Fry basket (right)
- Info card, manual and cookbook (on top of the oven)
Hardware specs
- Length: 15.75″
- Width: 15.14″
- Height: 13.38″
- Cord length: 39″
- Oven temperature range: 80 – 450 degrees Fahrenheit
- Oven timing range: 1 minute – 72 hours
- Capacity: 0.7 cubic feet, up to a 12″ pizza, up to six slices of bread
- Power requirement: 120V 60Hz
- Cooking power: 1,550W
Design and features
The oven is nicely designed. It is covered in stainless steel and has a large glass window integrated into the door. It should fit well into most kitchens. This is not a small toaster oven. At over 15-inches square and over 13-inches high, it takes some serious counter space. It seems to be designed to sit on the counter 100% of the time, as it would completely dominate any cabinet you were to shove it into.
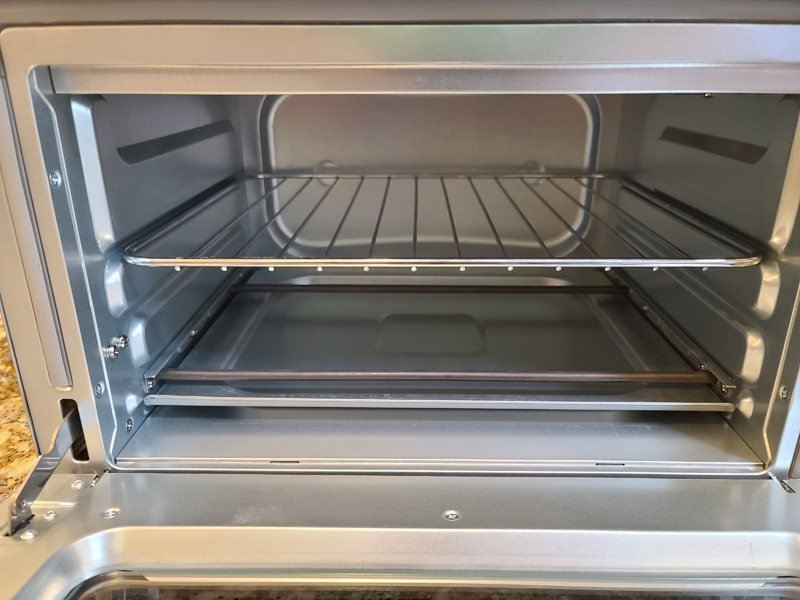
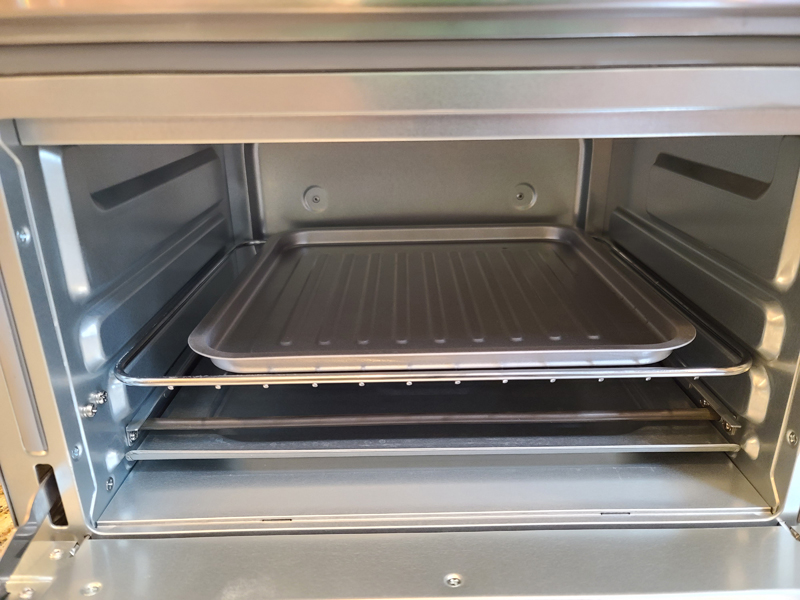
The door is hinged at the very bottom, allowing the door to fully open, giving you easy access to the inside. In the photo above, you can see the crumb/drip tray installed just below the lower heating elements and the oven rack installed in the upper location. There are two rack locations available and the cooking guide tells you which to use for each style of cooking. Here is the rack in the lower slot.
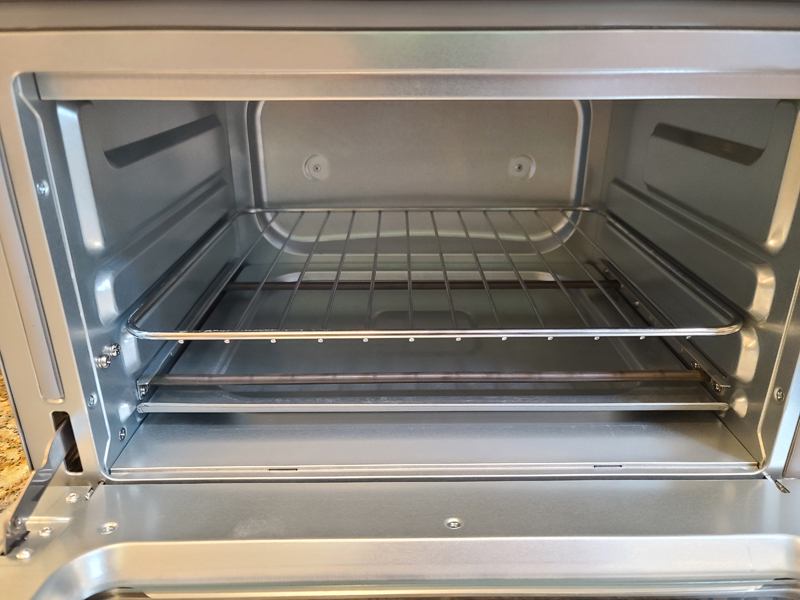
The baking tray just sits on top of the oven rack.
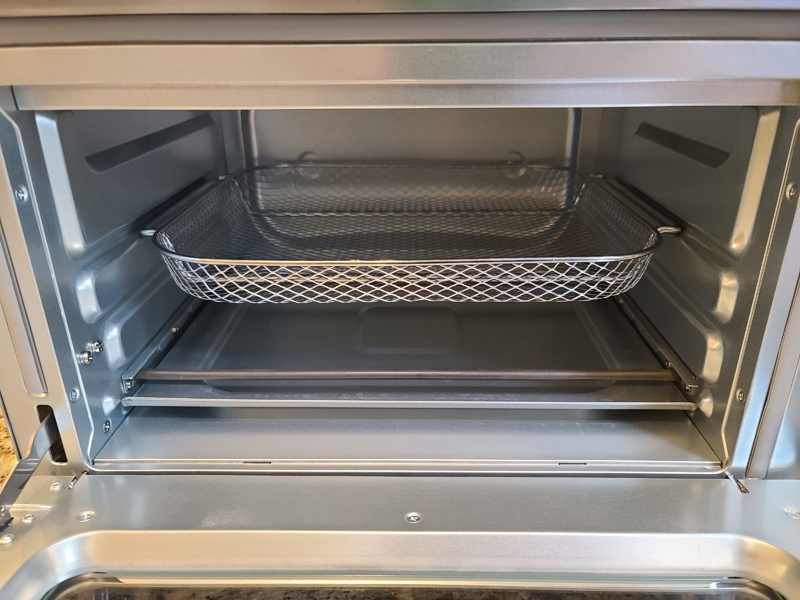
The fry basket is designed to install on its own without the oven rack.
The display lights up blue when ready to set.
To set the oven, you use a combination of the setting dial and five buttons.
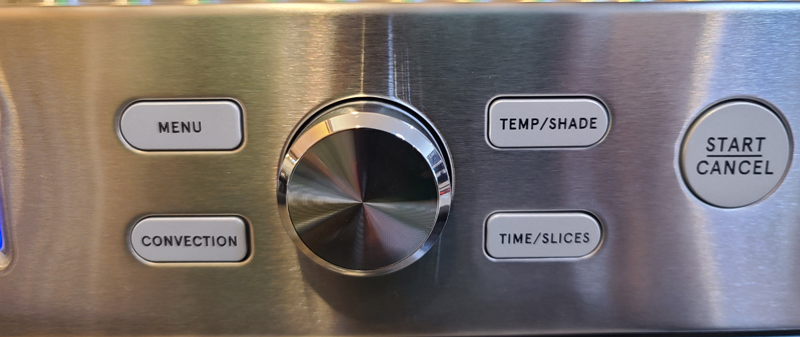
MENU
Brings you to the setting mode where you choose the style of cooking
CONVECTION
Turns the conversation fan on/off in cooking modes where that is an option
TEMP/SHADE
Allows you to change the cooking temperature or toasting shade
TIME/SLICES
Allows you to change the cooking time or number of toasting slices
DIAL
Spin to choose the cooking style, change temperature, shade, time, and slices
START/CANCEL
Starts cooking or cancels cooking
Once cooking starts, the display changes to orange and pertinent information is displayed.
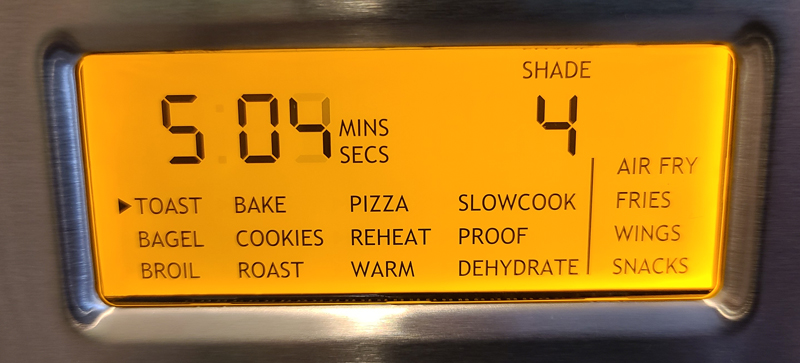
The shot above shows the triangle indicator next to TOAST, which shows that 5:04 is remaining and that I am cooking to shade 4 of 7.
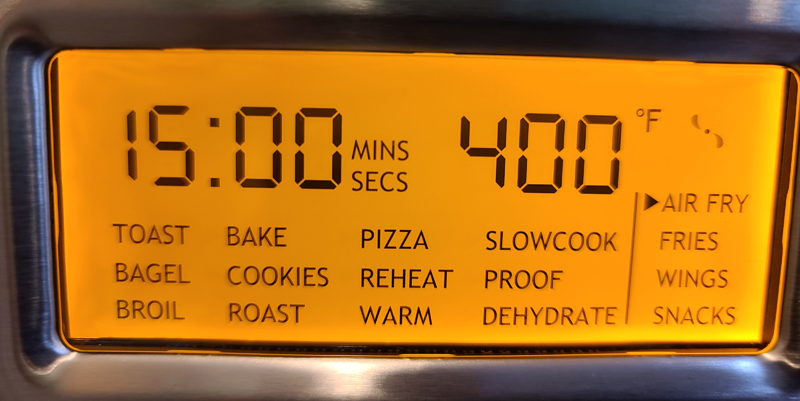
This shot shows 15 -minutes of remaining cook time at 400F during an air fry. The symbol in the upper right is an animated fan that shows whenever the convection fan is running.
When the oven is preheating, “PREHEATING” displays just above the time/temp.
Setup
There isn’t much set up to do as it is ready to use right out of the box. I washed and dried all the included trays/baskets and was ready to start cooking.
Performance
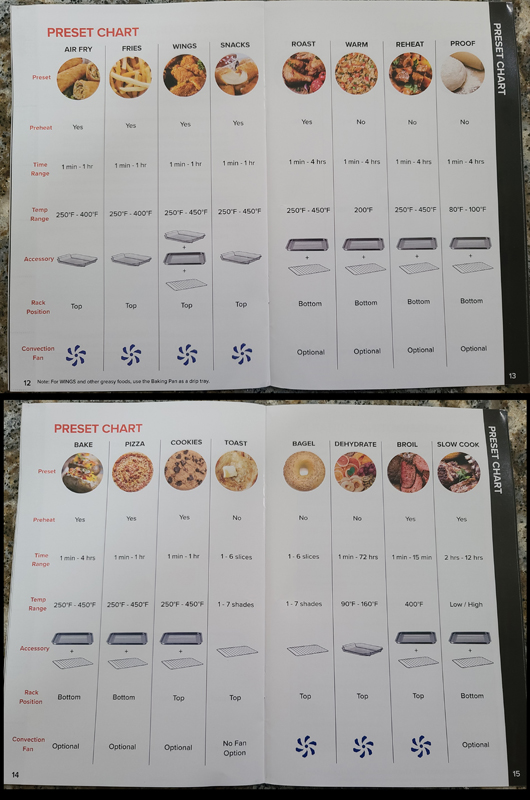
The manual has a nice chart showing all 16 preset cooking modes, the proper rack/tray/basket to use, where to position it/them, temperature and time ranges, whether the oven will preheat, and convection settings. It does not explain whatever the subtle differences are
All this stuff is cool, but…how does it cook? Here are my results, broken down by type of cooking.
Air frying
I started with a favorite – tater tots. Let’s get this out there – I hate baked tots. They never come out anywhere near as good as fried tots. But, fried tots are greasy and certainly not healthy, not that tots are healthy food in the first place. Then I tried air frying tots in our Uten air fryer that I reviewed back in September 2019. Air-fried tots come out just as good as oil-fried tots without all that extra oil. Talk about life-changing!
I dumped some frozen tots into the fry basket, set the oven for “FRIES”, essentially a separate air frying mode, and hit start. The oven displayed “PREHEATING” on the top of the display. Once the oven was preheated, the oven emitted a beep and the cooking timer started counting down. This is my first complaint. If you aren’t standing right by the oven when it beeps, you will miss it and the cooking time will be running down with an empty oven. A better solution would be a repeated beep, or perhaps a flashing orange/blue display, and then require hitting the start button again to begin cooking. If you do miss it, you can adjust the cooking time on the fly, but still, who stands next to the oven waiting for the beep?
Most air fryers are drawer-style, meaning your food gets shoved into a cavern, never to be seen until cooking ends. This is a bright spot for the Gourmia design. I could look in the large window and catch a glimpse of my tots, ensuring they weren’t overcooking. When the cooking completed, the oven beeped again and turned off.
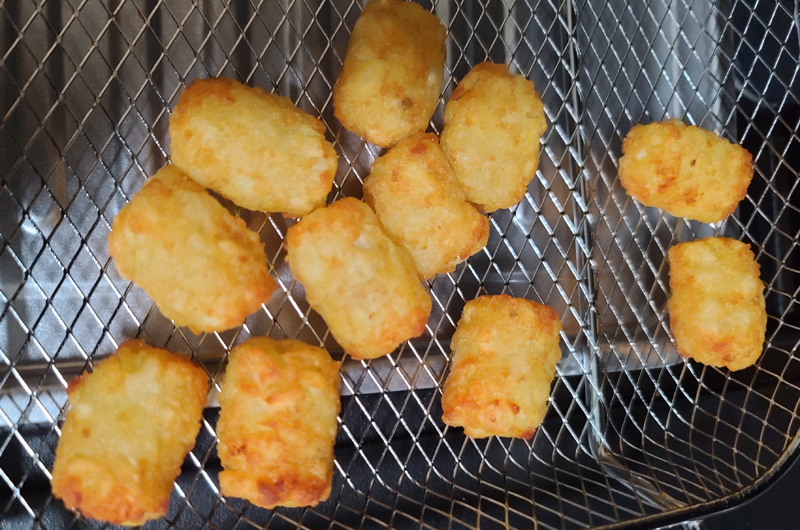
The tots were perfectly cooked, lightly browned and crunchy on the outside and hot and soft on the inside. Tots = win.
For dinner one night, I was going to wrap some leftover barbequed chicken, some crumbled bacon, and shredded cheese in a tortilla and microwave it. My lovely wife suggested trying to make a chimichanga – essentially a deep-fried burrito. I’m up for a challenge, so I loaded up the tortilla and folded it up. Then, I spread a very, very light layer of butter on the outside. I expect I used less than a quarter teaspoon – just enough for a light coat. I will also try it with olive oil, but for this test, it was butter.
After a preheat to 375F, it went into the oven for five minutes.
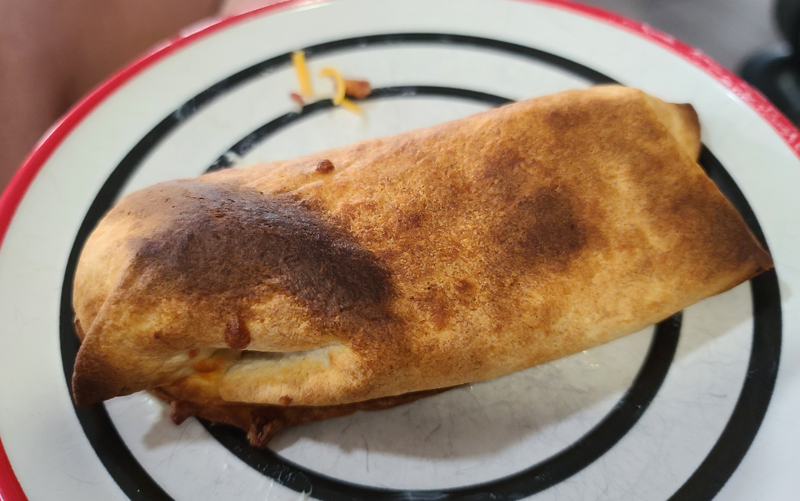
What came out was way better than I had expected. The tortilla was crunchy and flavorful. The insides were hot, cheese melted and gooey, and wow, it was delicious. Chimis = win.
Gourmia claims that the oven heats quickly. In my testing, preheating to 400F took about 4-minutes. That’s the same as the 4-minute cooking cycle I had selected. Still, that’s way faster than preheating our full-sized oven, so it’s all about perspective.
Another note about air frying and preheating – preheating seems to be a timed thing and not a temperature thing. We air-fried some potatoes and guessed at the time. When it finished, we found that we under-guessed, so they needed more time. After setting the oven for more time, it went into preheating mode again. Not an issue, since it should only take a few seconds with a hot oven, right? Nope. The preheat cycle took several minutes, just like when we first turned on the oven. That’s another ding in my book. It applies across all cooking modes that have a preheating cycle. Consider cooking something, and it needs another couple of minutes. You can’t throw it right back in as the oven will go through another preheat cycle.
Still, even with the dings, air frying is terrific in this oven.
Air frying = win.
Dehydration
I have never dehydrated food. I’m not opposed to it – just never had the tools or gumption to try it. Since the Gourmia had a preset for that, we sliced up an apple, powdered it with a little cinnamon, and started drying.
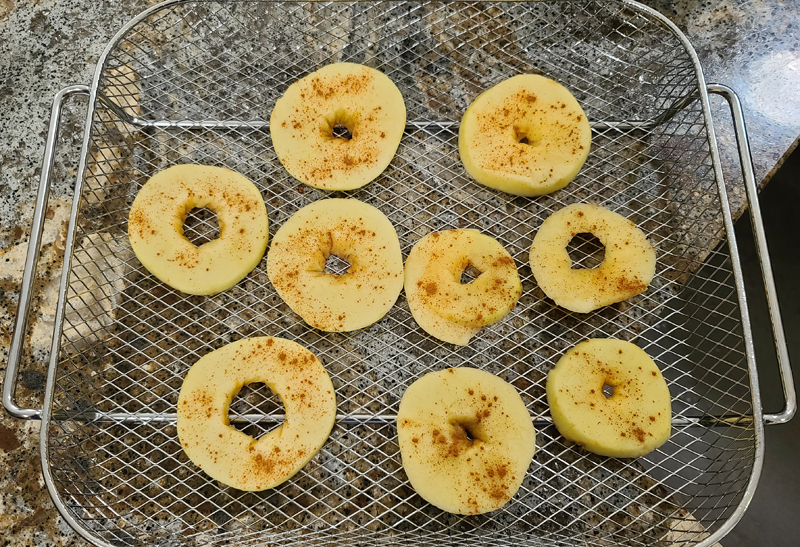
This showed me one limitation of this oven. Dehydrating food takes space. You have to put everything in a single layer. The fry basket could hold at most, two apples at a time. Dehydrating took seven, count ’em, seven hours at 100F. The time is consistent with a dedicated dehydrator, but those have multiple layers that can be stacked so you can dry out a bunch of food over that time. We got nine apple pieces for those seven hours.
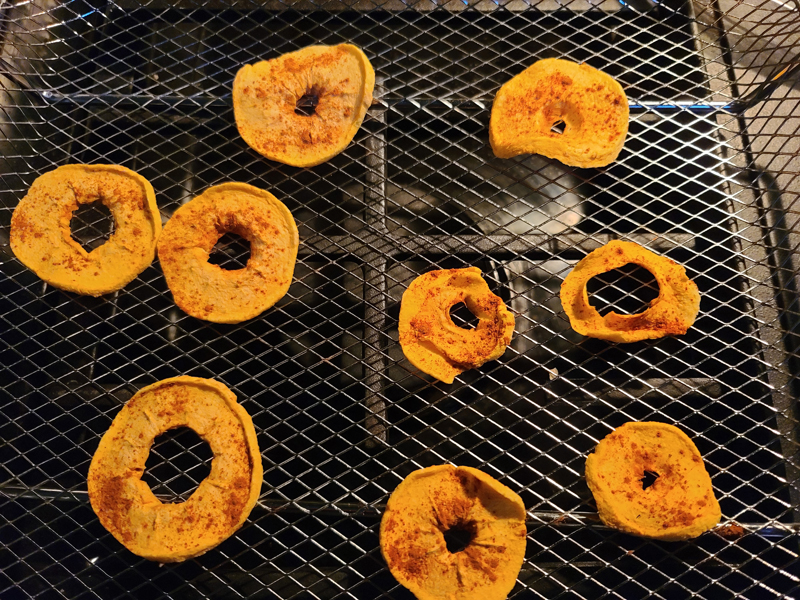
They tasted great and were like other dehydrated food I have tasted, but the capacity just isn’t there for large scale drying.
Dehydration = meh. Quality of results = win. Capacity = lose.
Toasting
I won’t drag out toasting, because it’s, well, toasting. The bottom line is that this is a really, really slow toaster. I toasted two pieces of bread in our four-slice toaster in just over two minutes. The same job took four-and-a-half minutes in this toaster. Granted, I could potentially do six slices in the Gourmia and only four in my dedicated toaster. Depending on how dark you like your toast, this will double your toasting time, maybe even more.
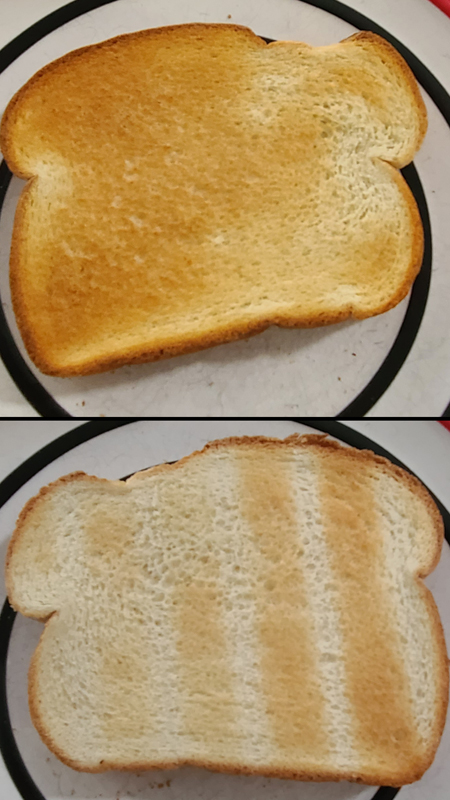
It did do a nice job, evenly browning on top and again on the bottom except for the rack bar areas.
I also tried frozen waffles and was quite impressed with the results. In my opinion, they were better than in the toaster, but again, painfully slow. If you plan for that, it can still work, and the results are good.
Here’s a frustration – the default for toasting is four slices and shade level four. There is no way to change that. In my case, if I toast two slices to shade level five every day, then every day, I need to change the settings from 4/4 to 2/5. That means pressing the SLICES button, dialing from 4 to 2, and then pressing the SHADE button and dialing from 4 to 5. Not a huge deal until you have to do it nearly every single time you use that function, it gets annoying quickly. Suggestion – allow for a personal preference default.
Toasting = mixed. Quality of results = win. Time to get those results = lose.
Bagels
Cooking a bagel is just toasting, right? Not in this oven. It also engages the convection fan to circulate the air, providing a more even toasting experience while not drying out the inside of the bagel.
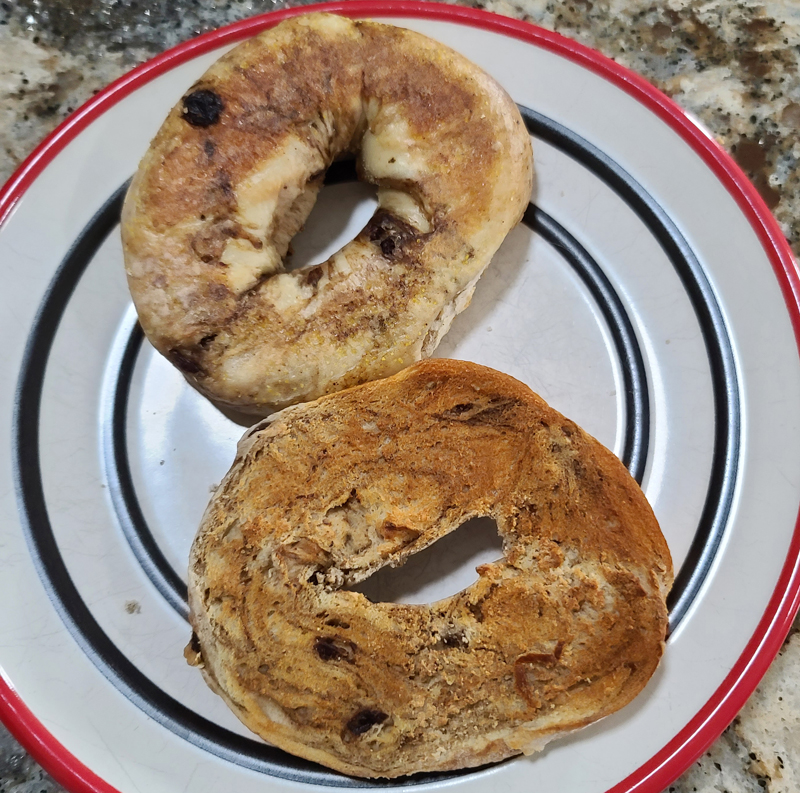
Again, while slower than a traditional toaster, the results were great – crispy surface while still retaining that chewy interior bagel goodness.
Bagels = mixed. Quality of results = win. Time to get those results = lose.
Pizza
We got home late the other night after 2.5 hours of water volleyball. We were both famished but whipped from the game. My lovely wife popped in a frozen Digiorno rising crust round pizza into the oven. We cooked it on the “PIZZA” setting, a dedicated baking mode, adjusting the time based on Digiorno’s recommendation. The pizza came out with a nicely risen, fluffy, crispy crust, melted cheese, and browned pepperoni. I didn’t take a photo as it looked so good, we cut it and chowed immediately.
Pizza = win.
Cookies
Generally, when my wife bakes cookies, she bakes several trays of cookies. I figured that the cookie setting was essentially useless for us. But, this could be perfect for someone that keeps some slice-and-bake or homemade dough in the fridge. Pop a couple in the oven while you’re eating dinner and then have fresh-baked cookies for dessert. So, while my wife was firing up the big oven, I fired up the Gourmia in “COOKIES” mode, essentially a dedicated baking mode, and stole four balls of dough.
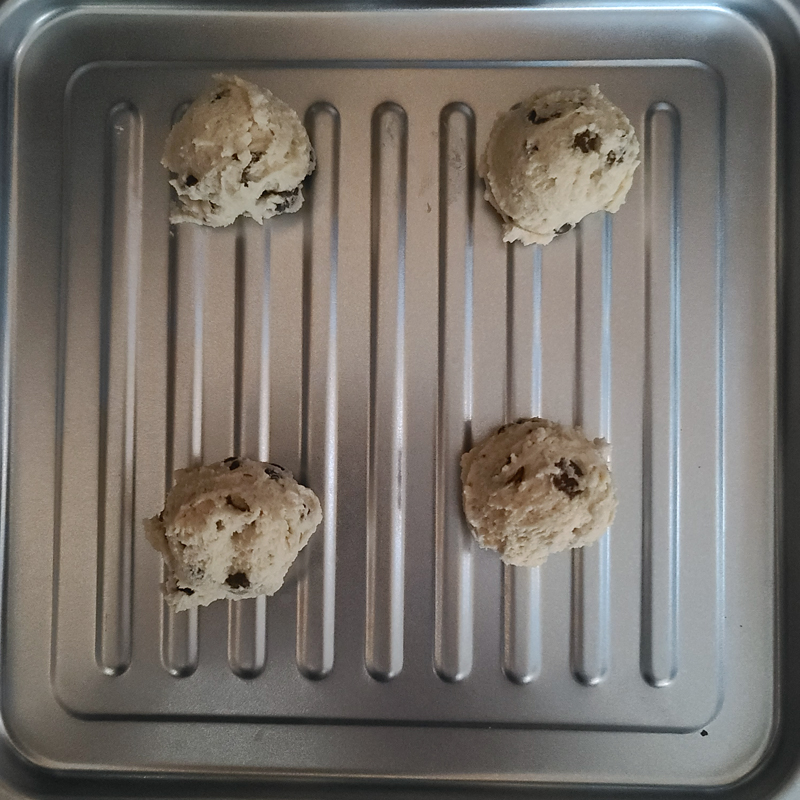
I started preheating the Gourmia to 375F and 10-minute cook time (the recipe said 9-11 minutes) at about the same time she fired up the gas oven. Here’s where my first ah-ha moment arrived – the Gourmia hit 375F and the big oven was at 198F. Perhaps I was too hasty in thinking the preheating was slow back when I was testing air frying. I tossed the pan in and waited.
After just a few minutes, I could smell the goodness in there. Checking the cookies, it was obvious that nine minutes would be plenty. A light in the oven would be handy, but you can still see in there pretty well.
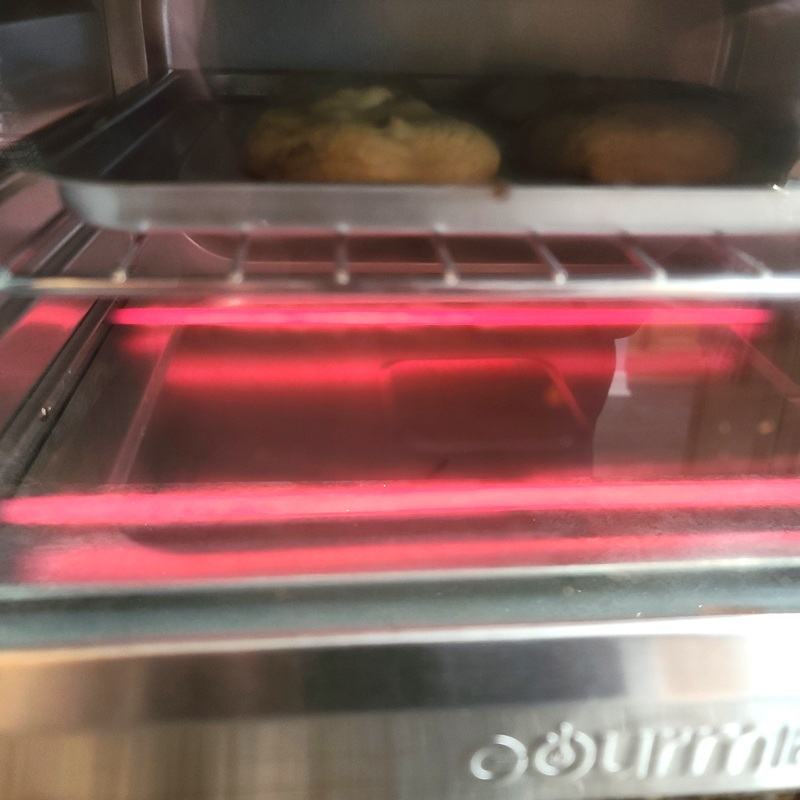
The big oven preheated with about one minute left on the Gourmia’s cook time. This rounded out the ah-ha moment – I could have fresh, hot cookies from the Gourmia before we even started baking in the big oven.
What came out were nicely fluffy, nicely browned cookies. Total time start to finish – about 13 minutes.
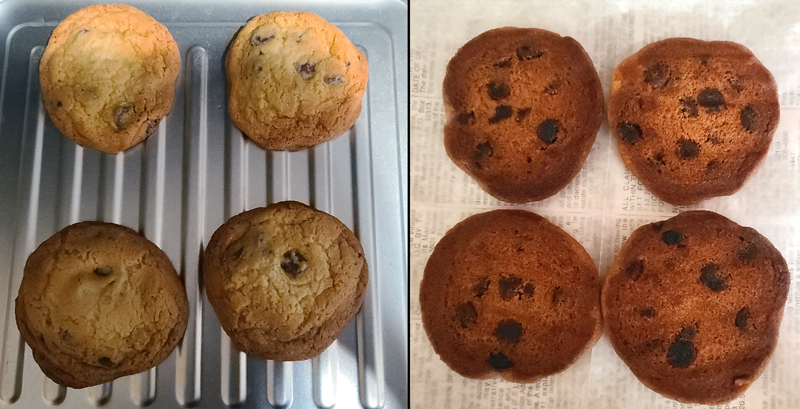
You can’t make a big batch, but for one or two people, this is perfect. A second batch would suffer from the same issue I mentioned above where preheating is timed, not temperature-based.
I took the pan to the sink, drizzled some soap in, ran the water, and had it washed, dried, and put back in place in another two minutes. That makes it 15-minutes from dough to cookies to clean. Sweet. (and tasty)
Cookies = win.
Other modes
We didn’t try every cooking mode. We didn’t get around to broiling but do not doubt that this oven will broil successfully. We have yet to use the reheat function. For many things, reheating with the air fry mode works wonderfully. I use air fry to reheat pizza, french fries, onion rings, and even burgers with impressive results. We did not try the snack mode – again, this seems to be an air fry sub-mode. We didn’t try the bake mode but did try several of the dedicated baking modes.
We also didn’t try the PROOF mode. This is used to keep dough at a warmer temp than room temp while it is rising. We live in central Florida and it’s summer. We just pop the bowl in our enclosed lanai with the air turned off. But, if you live in colder climates and like to bake bread, having a small oven to keep your dough at 80F-100F is perfect.
Clean-up
So far, cleaning the oven has been a simple task. The interior surfaces wipe up nicely and the window cleaned up easily. The trays and baskets cleaned well in the sink and dishwasher. Cleaning = win.
Miscellaneous
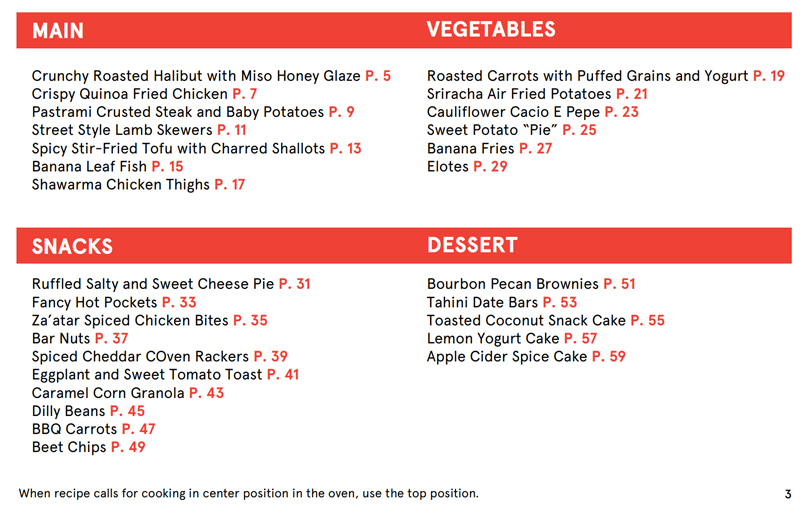
The included 60-page cookbook comes with many interesting ideas for creative chefs. The recipes use the air fry, bake, and dehydrate modes.
One final complaint – the display. When the oven is plugged in, the display is on. I wish there was a way to turn the oven off completely without having to unplug it. Luckily for me, the plug I use is behind and to the left of the oven’s location. If it was directly behind, I’d have to move the oven every time I wanted to use it.
The other frustration is the convection fan. After only a few days, the fan started rattling during use. This calls into question the long-term viability of this oven. Only time will tell, but so far, it is working, albeit a little noisily.
What I like
- Large window so you can monitor your cook
- Wide variety of cook modes (perhaps too many)
- Cooking results have been universally excellent
- The display shows all necessary info
What I’d change
- Toasting is very slow
- Toasting defaults to 4/4 every time – allow changes in defaults
- Add a delay after preheating before cooking starts
- Preheating is a timed cycle with no consideration for the current oven temperature
- Add the ability to turn off the oven without unplugging it
- I’m a little worried about the fan noise, but so far, so good
- A light in the oven would be nice
- Combine similar functions, or explain the differences
Final thoughts
I know that it seems like I have a lot of improvements listed for the oven, and I do. These little things certainly detract from the overall experience, and if those things were corrected, this would be an amazing oven. That being said, this is still a terrific oven. It does everything well, albeit slowly in some modes.
One interesting thing is the number of different cooking modes. To me, it seems like overkill as they seem to duplicate each other to a point. Wings, fries, and air fry seem to have a lot of overlap. Perhaps I’m missing some of the subtle differences between these modes and nothing in the documentation explains it. The same is true with bake, pizza, cookies, reheat, and so on. I think the user interface could be simplified by eliminating similar functions. Either that or explain why they are different.
The capacity is perfect for one or two people. It takes up some counter space but looks good doing it. If you live in a hot climate as we do, having a small oven that does a great job without heating the whole kitchen is a wonderful thing. As long as you have the patience for slow toasting speed, this has the potential to replace a bunch of other appliances in your kitchen.
Price: $139.99
Where to buy: Amazon and also available for $189.99 at Best Buy
Source: The sample of this product was provided by Gourmia.
tinyurlis.gdu.nuclck.ruulvis.netshrtco.de
