CrowPi2 All-in-one Raspberry Pi STEM laptop review
REVIEW – Having done a news article on the CrowPi2 which you can read here, I was super excited to get some hands-on experience with it. The CrowPi2 is a great introduction to programming with step-by-step instructions and pre-wired built-in modules and sensors. With everything self-contained removes the need to wire everything together allowing the user to focus on learning the programming language rather than wondering if the error is in the way it was built or in the code.
What is it?
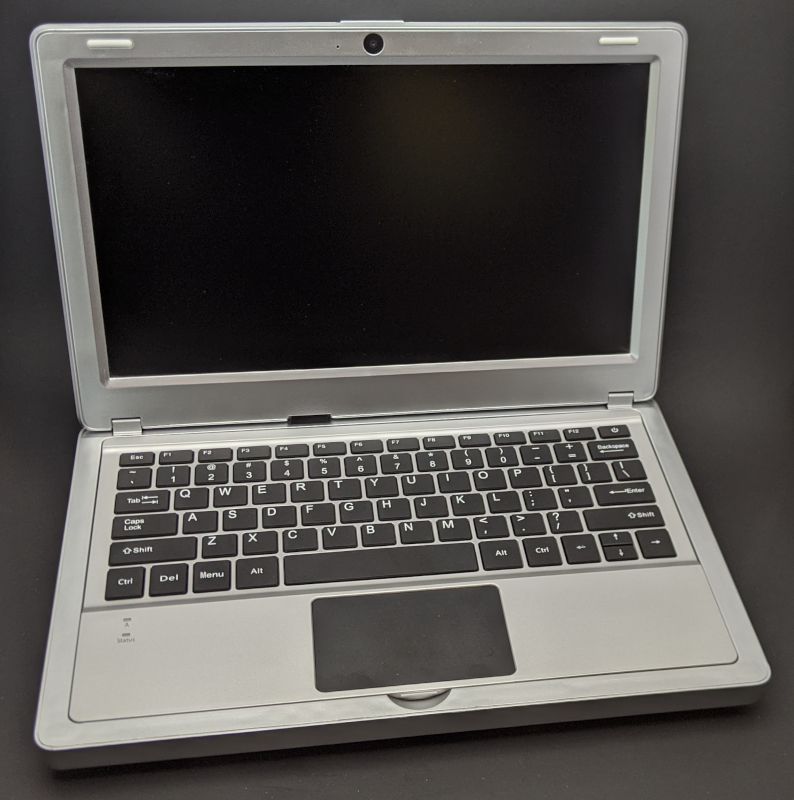
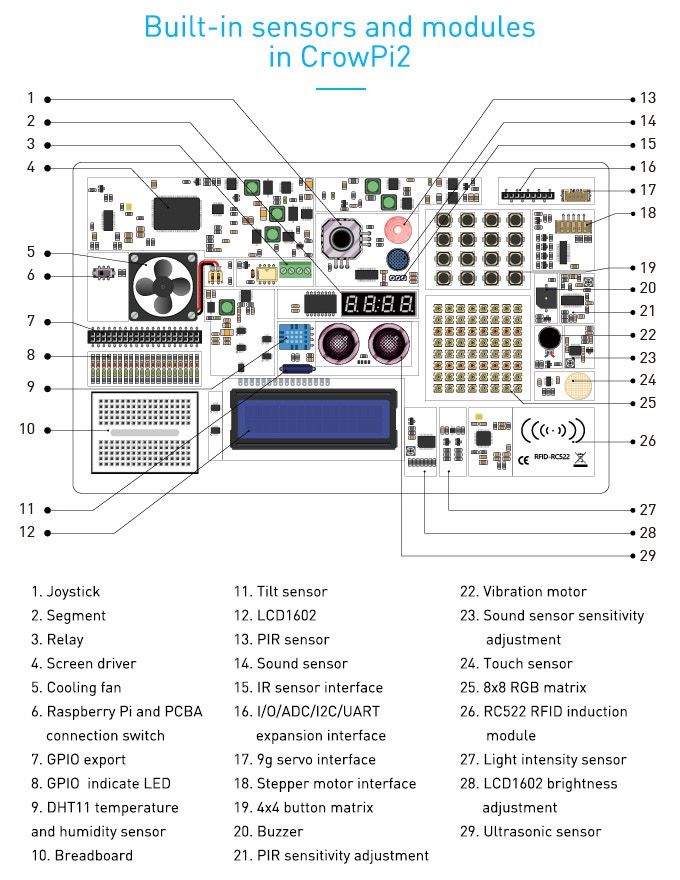
The CrowPi2 is an all-in-one STEM (Science, Technology, Engineering, Art & Mathematics) learning platform built into a Raspberry Pi based laptop.
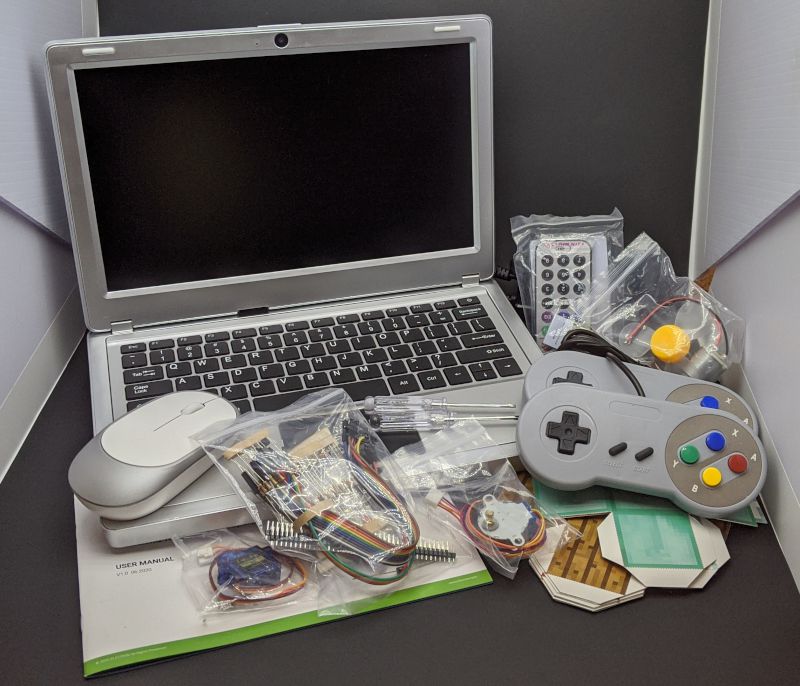
What’s in the box?
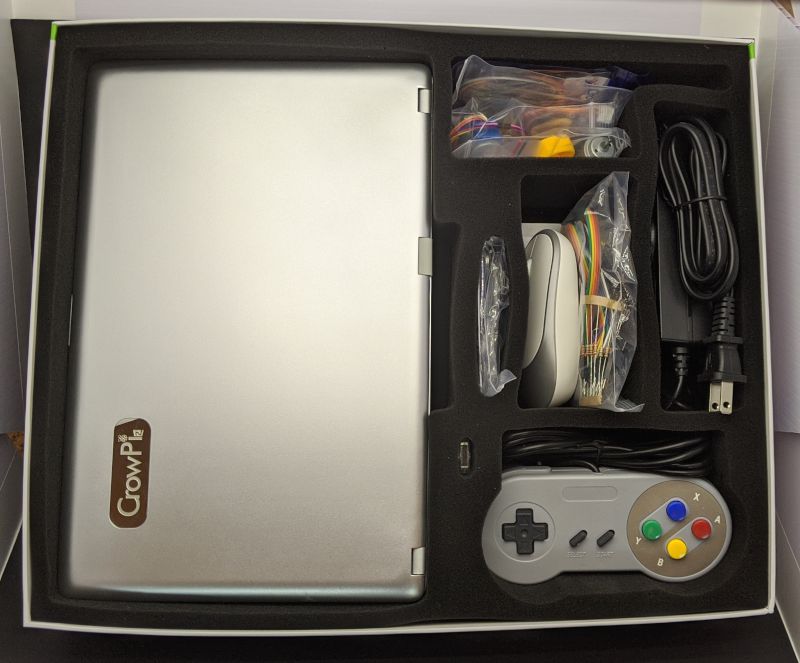
This list is for the starter level kit, if you purchase a different level kit it may not match this list.
- CrowPi2 laptop
- Wireless keyboard, mouse & USB dongle
- Raspberry Pi 4B – 4GB
- 32GB TF card with customized system & reader
- 12V/2A power supply
- Micro & standard HDMI connectors
- IR remote & receiver
- Stepper motor
- Crowtail – 9G servo
- DC motor with mini fan
- Philips & flathead screwdrivers
- RFID card & tag
- Crowtail – Moisture sensor
- 10 NFC disks
- 2 retro game controllers
- Components pack
- Minecraft block printouts – 10 blocks
- User manual
Hardware specs
- Dimensions: 11.5in wide, 7.5in deep, 1.75in height (closed)
- Weight: 2.8 lbs
- Screen: 11.6in 1920*1080 IPS
- Camera: 2.0MP with built in microphone
- Power supply: 12V DC / 5V USB
- Power port: DC / Micro USB
- Keyboard & mouse: 2.4G wireless
- Audio output: Stereo speakers, 3.5mm headphone jack
- Raspberry Pi: Compatible with versions 3B, 3B+, 4 & 4B
- Operating systems: Raspbian, Ubuntu, CentOS, Windows IOT, KALI, Pidora, ArchLinux, FreeBSD, Kodi, OpenWrt, RISC OS, RetroPie, LAKKA, Recalbox, LibreELEC & OSMC
- Certifications: CE, FCC & RoHS

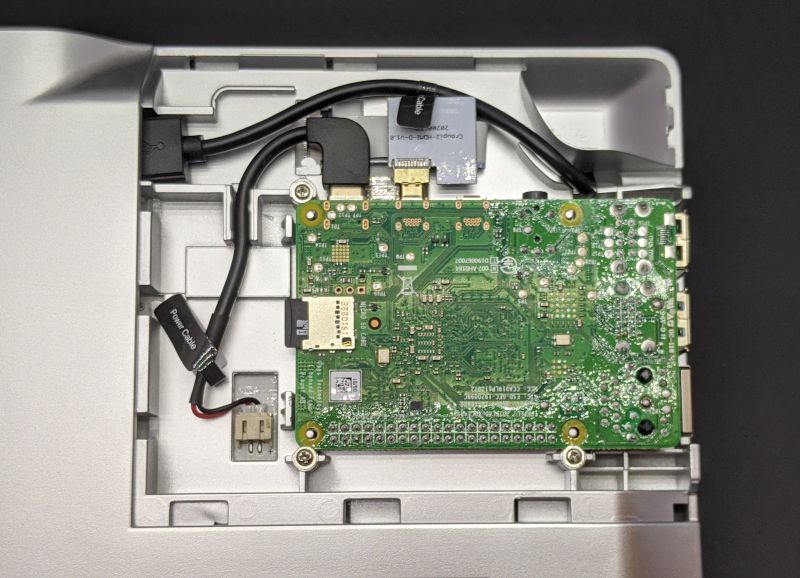
The Raspberry Pi is installed on the bottom of the laptop and connected to the laptop via the labeled cables.
Design & features
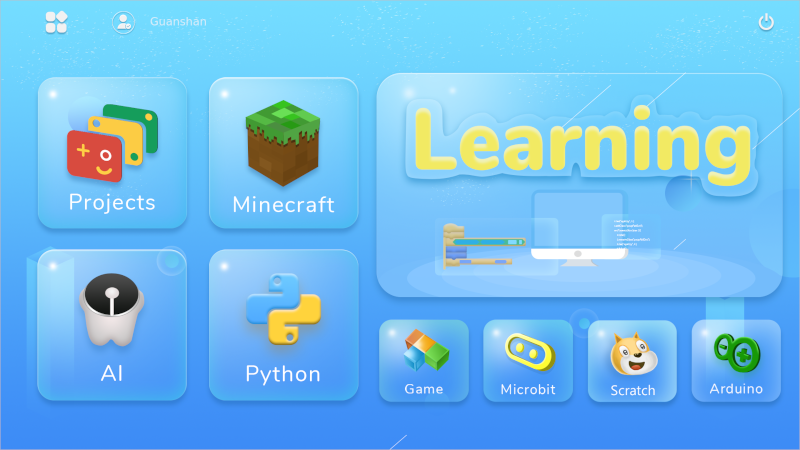
When you first power up the CrowPi2, it boots up into their customized system with different options to explore. At the top left of the screen shows the user that is currently logged in. With different user accounts, each person is able to learn at their own pace without getting confused about which lessons they completed. This review will focus on a couple of Python lessons, the built-in light sensitivity sensor and the 8×8 RGB matrix.
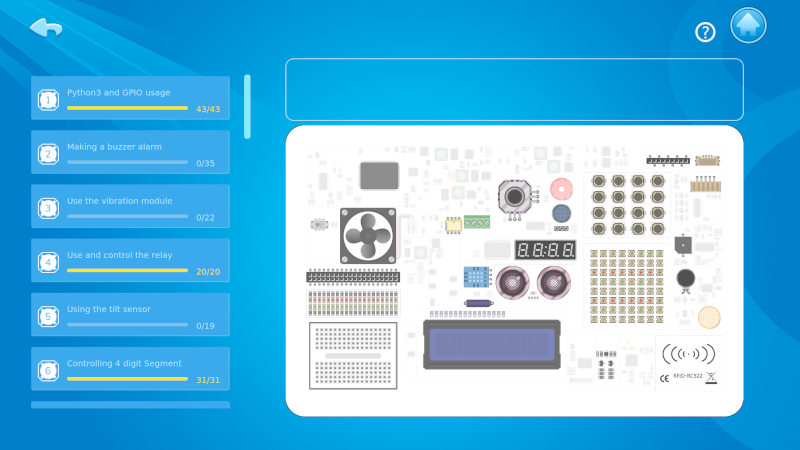
After selecting the learning button and the Python language, you come to the screen above. From here you can either select a lesson from the list on the left or hover over a component on the diagram to learn more about it and jump to the lesson on it by clicking on it.

The lesson screen is easy to navigate. The instructions are delivered via chat like text bubbles in the right hand window so you don’t get overwhelmed by a wall of text to read. On the left side is the text editor for typing code with the output window beneath it.
Working through the lesson it goes step by step first explaining what the next task is, then the code which accomplishes it and finally it goes through and explains what each line of code does. The code snippets provided in the lesson are copyable by clicking on the blue double page icon above the chat bubble so you don’t have to type out each line of code. I personally would advise that you type it out rather than just copying it because the point of the lessons are to learn the programming language so later on you can take a lesson and build a project off of it. At the end of the lesson, it does provide you the full project code so you can double-check your work or just copy and paste it into the text editor.
Now that the coding is complete you click on the green play arrow at the top of the screen to run the code and see what it does. This lesson was on how to use the light sensitivity sensor so when the code is run it prints out the current light level in lux both in the output window and on the LCD screen. When I covered the light sensitivity sensor with my hand, the lux level decreased drastically compared to it being uncovered.
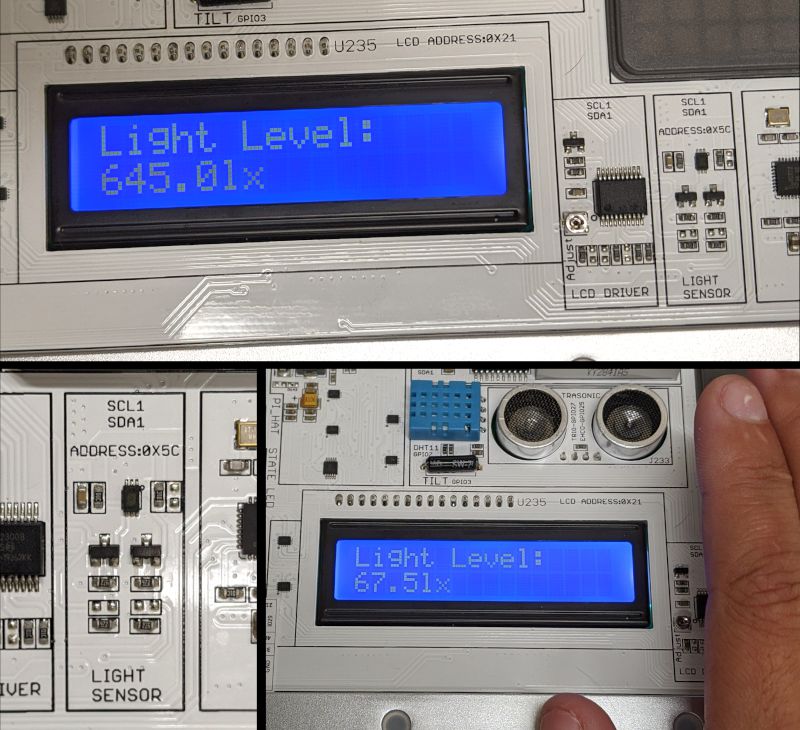
This lesson is a fun simple introduction to how the light sensitivity sensor works and how to utilize the data it produces. In this lesson, the data was only output to the LED screen but if you want to use it to trigger something based on the light level, this is an easy piece of code you can copy into another project.
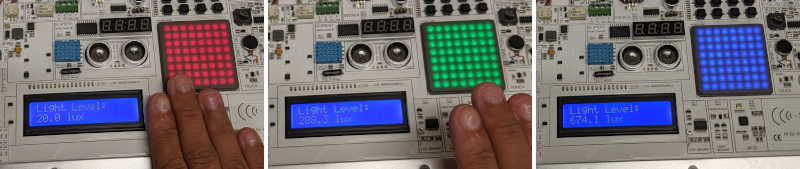
I combined the light sensitivity sensor and the 8×8 RGB matrix lessons so the RGB matrix would change color based on the light level. The matrix would be red if the light level is below 200 lux, green when the level is between 200 and 400 lux and blue when the light is above 400 lux. This is a good example of how the lessons can be used to build on top of each other to create a more sophisticated project.
What I like
- Prewired modules and sensors allow you to focus on learning the programming language rather than how to correctly connect everything together
- The step by step lessons are easy to understand and follow
- Easy to build off of and go beyond the provided projects and lessons
- Completely open-source which gives the user the ability to completely change and modify the whole system
- Tons of fun sensors and modules included depending on the kit purchased
What I’d change
- Have the locale settings on the Raspberry Pi pre-set to customer’s country
- Better wireless keyboard – since the Raspberry Pi has Bluetooth built-in, it would be nice if both the keyboard and mouse used Bluetooth rather than a USB dongle
- Silicone plug on storage drawer permanently attached rather than completely removable
- Printed pinout chart on the sensor and module surface comparing the GPIO.BOARD and GPIO.BCM numbers
Final thoughts
I absolutely love how accessible and open-ended the CrowPi2 is. The lessons are well designed and make it possible for anyone to build a project no matter their skill level. Even as a more advanced user, I didn’t run out of possible projects to explore or ways to combine modules and sensors. It also has projects in languages I don’t know so I’m excited to delve into those and learn a new language and skills. If you are looking for a good way to get started learning how to program, I definitely recommend using the CrowPi2.
Price: $170+ depending on the package
Where to buy: Check out their crowdfunding page on Kickstarter
Source: The sample for this review was provided by Elcrow
tinyurlis.gdclck.ruulvis.netshrtco.de